Set clear expectations and goals for employees and use game concepts to stimulate performance. Make feedback normal, pervasive, continuous. Recognise achievements both great and small. Get expert consultation now.
Set clear expectations and goals for employees and use game concepts to stimulate performance. Make feedback normal, pervasive, continuous. Recognise achievements both great and small. Get expert consultation now.
On the left navigation menu, click Engage. Under “People”, click Employees.
Mouse over the menu option on the top right and click New Employee.
Fill in the employee information in the fields provided, and click Save.
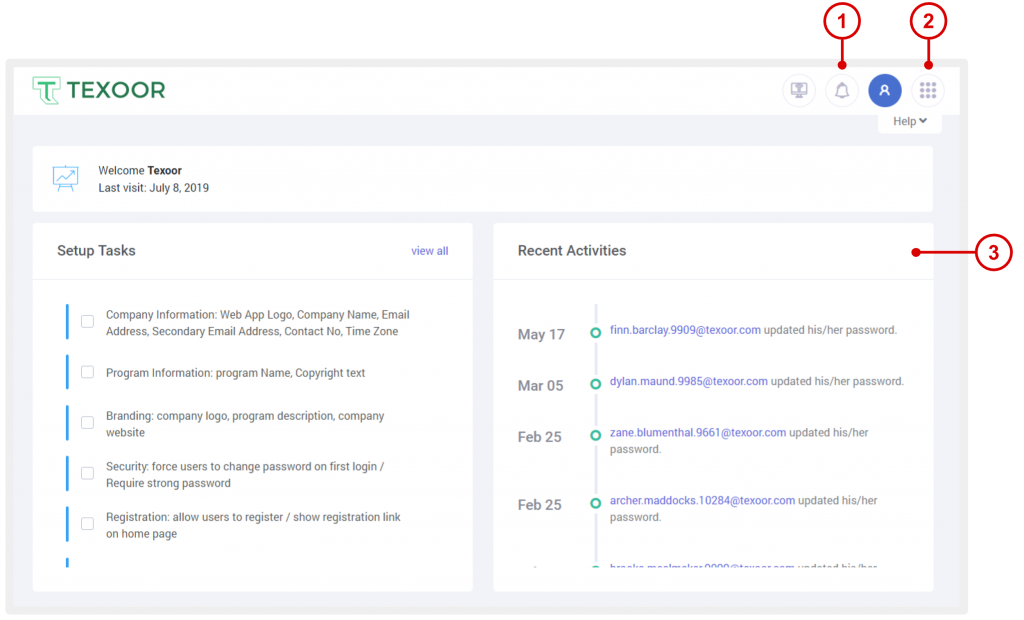
User Activities
There are up to three sections to view activities and notifications.
On the header menu, click to view user notifications.
On the header menu, click to view Messages and Notifications.
On your dashboard, go to the “Recent Activities” section to view login activities.
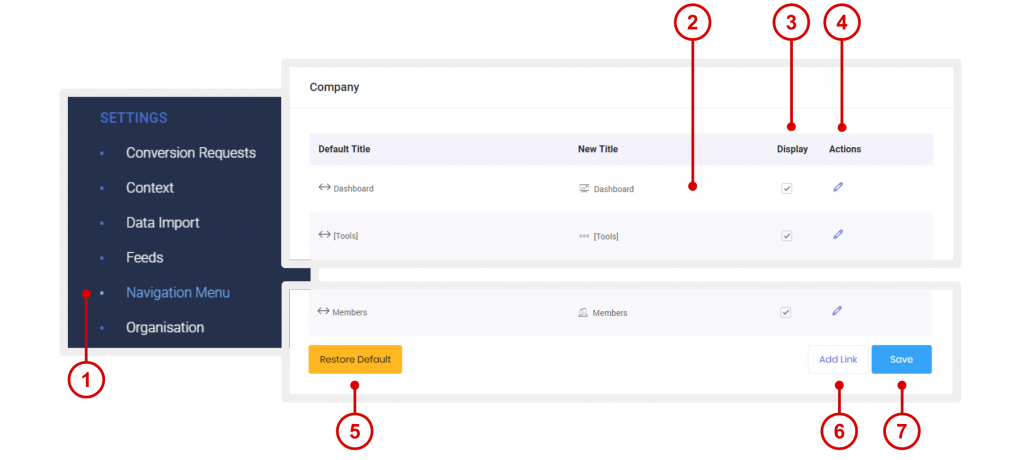
Custom Navigation Menu
This feature allows you to rename, reorder, and turn on or off navigation menus for admin and members.
On the left navigation menu, click Settings > Navigation Menu.
To reorder, simply drag up or down.
To turn on or off, use the checkbox under the “Display” column.
To rename use the pencil icon under the “Actions” column.
To go back to original or default settings, click Restore Default.
To add custom or external links to a web page, click the Add Link button below the page. In the pop up box that displays, enter a title, path, and select an icon, then click Create.
Click Save below the page to save any updates.
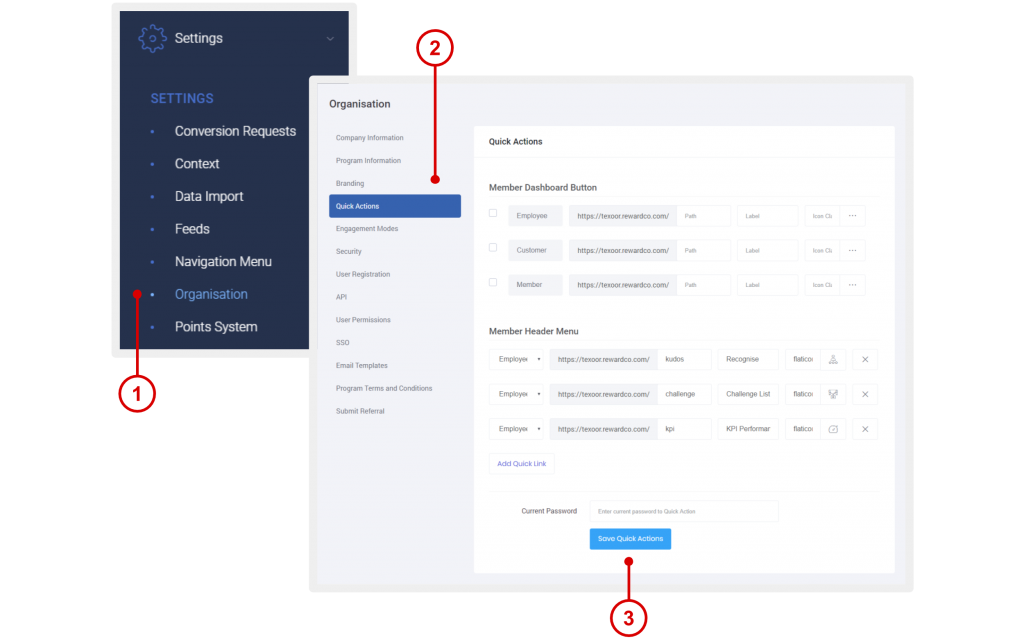
Quick Actions
Create custom buttons for your members to access various parts of the application. There are two types for quick action buttons:
On the left navigation menu, click Settings > Organisation or click on the profile icon on the top right, then click Profile.
Click the Quick Actions tab.
Member Dashboard Button: Displayed on the member dashboard, use this to create one button that links to a specific page in the application.
Member Header Menu: Displayed on the right side of the header near the profile icon, use this section to create several quick links to various pages in the application.
After making the necessary changes, click Save.
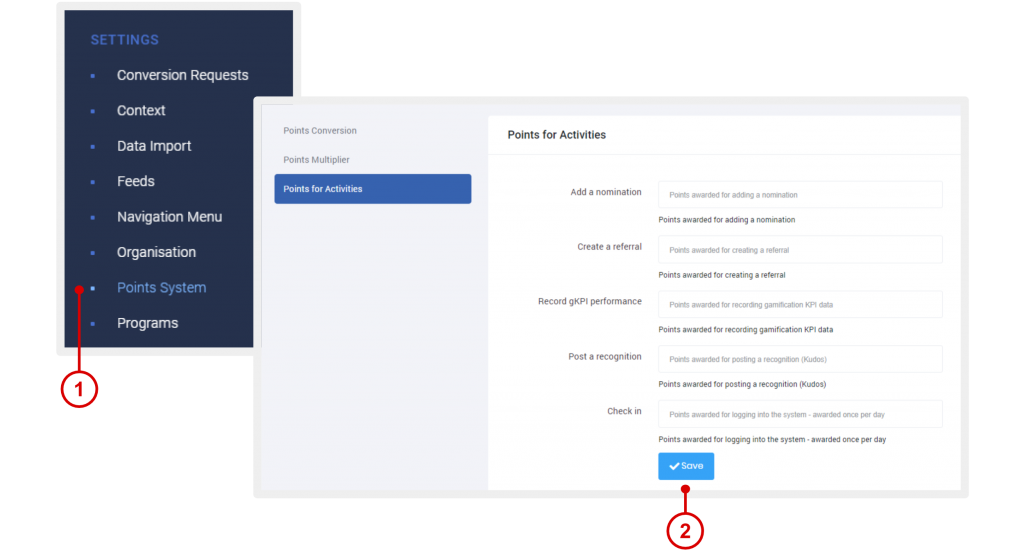
Adjust Points System
On the left navigation menu, click Settings > Points System.
On this page are three different tabs:
Points Conversion: Enter the equivalent points for $1 (Example: 100 Points = $1).
Points Multiplier: Enter the points conversion value for products in the catalog. For example: If set to 100 and the product price is $1 then the value of the product shown to members will be 100 Points.
Points for Activities: Award points automatically when members perform any of the following actions:
Add a nomination: Points awarded for submitting a nomination.
Create a referral: Points awarded for submitting or creating a referral.
Record challenge performance: Points awarded for submitting performance in a challenge.
Post a recognition: Points awarded for posting a recognition (Kudos).
Check-in: Points awarded for logging into the system - awarded once per day.
Once done editing, click Save.
Points-to-Cash Conversion Requests
This feature allows members to convert their earned points to cash. To turn this feature off, please notify RewardCo Admin.
On the left navigation menu, click Settings > Conversion Requests.
To adjust the equivalent points for $1, please see "Adjust Points System". To approve or reject conversion requests, under “Actions” click Approve or Reject.
Actions
Approved: System deducts points from member's points balance and credits member cash balance.
Rejected: Nothing happens.
Product Catalog
Optional wide range of items available for member redemption. Use your own catalog or preferred reward items if preferred.
Create custom catalogs or preferred reward items
On the left navigation menu, click Products + Catalog > Catalog.
Mouse over the menu option on the top right and click + Catalog.
Enter the necessary catalog information and click Save to create the catalog.
Add products manually, one at a time
On the left navigation menu, click Products + Catalogs > Products.
Mouse over the menu option on the top right and click + Products.
Enter the necessary catalog information and click Save to create the catalog.
Import or modify products via import spreadsheet
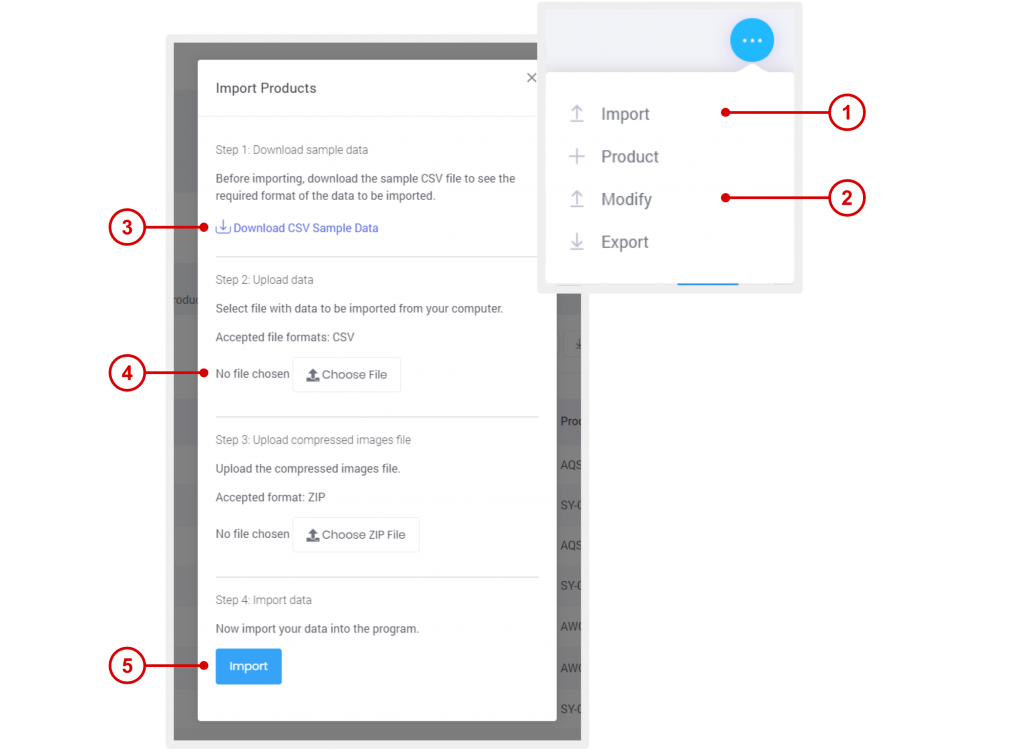
To import products, on the products list page, mouse over the menu option on the top right and click Import.
To modify products, click Modify.
Please read the instructions for importing, and click Download Sample Data to see the required format of the data to be imported.
Click Choose File to select the file to be imported.
Click Import or Modify to run the import.
We recommend that you wait while the system runs the import. If there are any errors with the import, you will be shown a report of the errors after the import is completed.
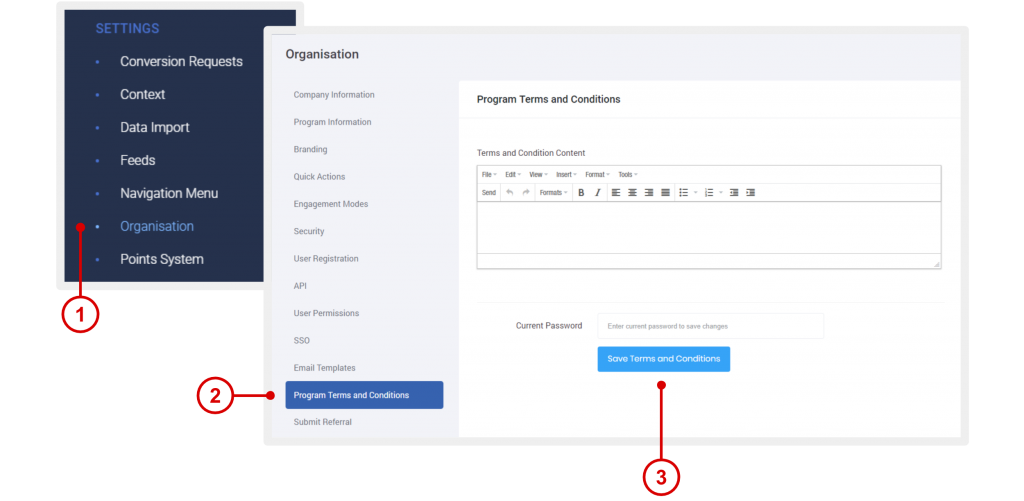
Program Terms and Conditions
Use this section to create your program terms and conditions accessible to members via the Help icon on the left navigation menu, and the Registration page for users not logged in.
On the left navigation menu, click Settings > Organisation.
On the left tab, click Program Terms.
Enter your program terms in the field provided, enter your current password, and click Save.
 EMPLOYEE ENGAGEMENT
 CUSTOMER ENGAGEMENT
 MEMBERSHIP ENGAGEMENT
 PARTNER ENGAGEMENT